Godot Survivors
After hearing a lot of positive buzz around the 4.0 version release and witnessing Unity’s extensive promotional campaign last year, I couldn’t resist checking Godot out.
This year, I set out to master the fundamentals of Godot, diving into documentation and applying my knowledge to practice. Below is the progress of my studies so far. Of course I’ve just barely scratched the surface of what Godot has to offer, but it’s just the beginning - Godot is cool and I’m hooked.
First prototype
I began as I usually do, looking into some YouTube tutorials to grasp the basics and get comfortable with the engine.
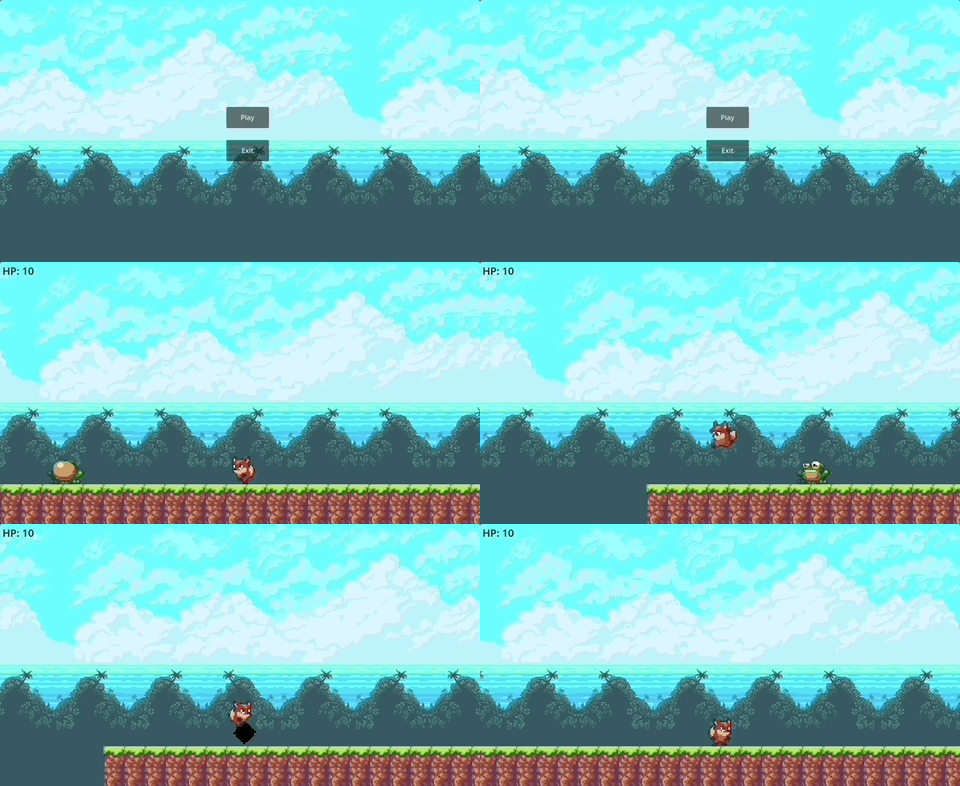
The first project was super barebones and there’s not much to say. However, it did give me a good sense of the engine’s interface and the general way of doing things in this neighbourhood.
Moving on
Next, I decided to build a Vampire Survivors clone, following a tutorial from GDQuest to then continue building on top of it by myself.
By the end of the course, I had a basic prototype: an animated character that can move and attack continuously spawning enemies on a simple terrain with minimal UI. When the character’s health reaches zero, it’s game over.
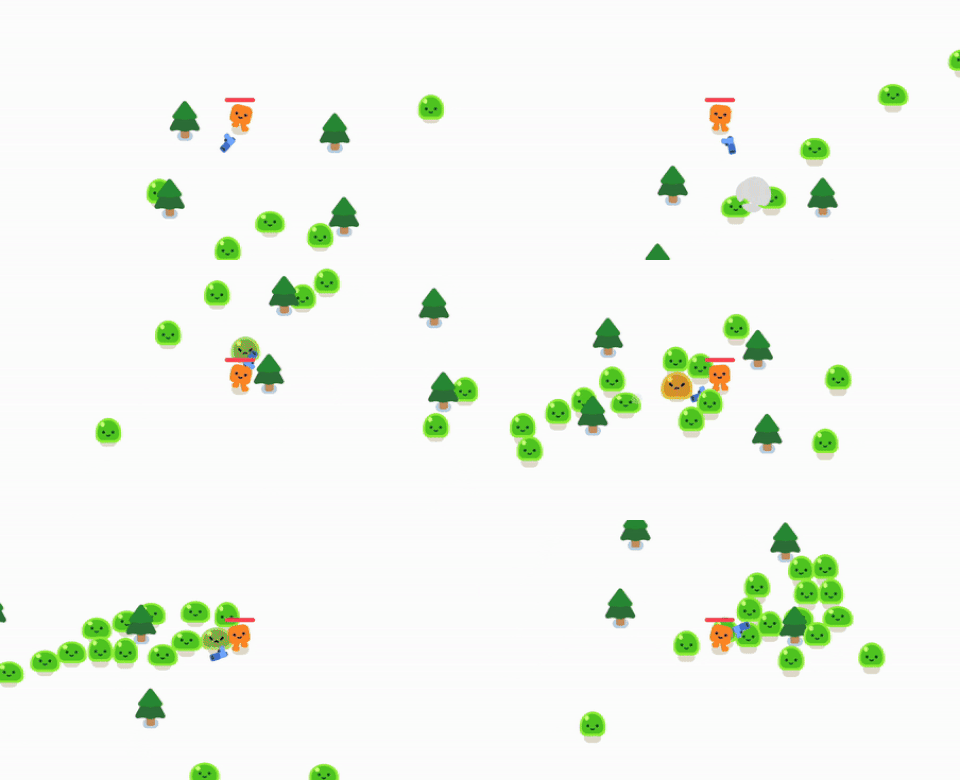
Nothing too fancy, but this was the moment when I felt like I was really starting to get the hang of it. Having plenty of Unity experience, many concepts were easy to grasp, but still it takes some time to click.
The editor itself is all familiar stuff: here’s your Scene window, File browser, Inspector etc. But many other things differ: figuring out how to organize the scene object tree, navigating it effectively, learning to compose nodes into scenes correctly, and understanding how to use GDScript efficiently with the built-in script editor.
After finishing this mini course, I made a list of extra features I wanted to add to the game. Then, I dove into the Godot documentation and GDScript reference, in preparation to expand the base scope of the project.
Player progression
The first thing to implement was a progression system in form of getting experience points from defeated enemies to level up the player’s character.
To gain experience, enemy needs to drop it first. To do this, I check if the enemy’s HP falls below 0, spawn death particles and instantiate an XP drop scene.
The xp_drop.tscn itself is just a StaticBody2D node with CollisionShape2D and Sprite2D child nodes. The base node is assigned to a Node Group named “exp” to identify the drop among other collisions.
func take_damage(damage):
	%Slime.play_hurt()
	health -= damage

	if health <= 0:
		# spawn smoke particles
		const SMOKE = preload("res://smoke_explosion/smoke_explosion.tscn")
		var new_smoke = SMOKE.instantiate()
		get_parent().add_child(new_smoke)
		new_smoke.global_position = global_position

		# drop xp
        # preload is called once on init
		const XP = preload("res://xp_drop.tscn")
		var new_xp = XP.instantiate()
		get_parent().call_deferred("add_child", new_xp)
		new_xp.global_position = global_position

		on_death.emit()
		queue_free()
Next, we need to implement the collection of XP drops by the player character.
To set this up, we’ll add a few new properties to the player:
- current XP counter
- XP required to level up
- player level counter
@exportproperty for a progress bar to assign it from the Inspector
var _xp = 0
var _xp_to_lvl_up = 5
var _lvl = 1
@export var xp_bar : ProgressBar

# set up progress bar
func _ready():
	xp_bar.value = _xp
	xp_bar.max_value = _xp_to_lvl_up
Our character has an Area2D child node responsible for pickups. We can subscribe to body_entered signal of this node to check if the body belongs to the “exp” group, and then gain experience points if it does.
func _on_collection_box_body_entered(body):
	if body.is_in_group("exp"):
		gain_xp()
		body.queue_free()


func gain_xp():
	_xp += 1
    #update progress bar
	xp_bar.value = _xp

    #check if enough xp to level up
	if _xp >= _xp_to_lvl_up:
        #increase level
		_lvl += 1

        #update level count label
		%ProgressBar/XPLabel.text = "lvl %s" % str(_lvl)

        #reset xp
		_xp = 0

        #calculate new xp value required to level up
		_xp_to_lvl_up = snapped(_xp_to_lvl_up * 1.1, 1)

        #reset xp progress bar
		xp_bar.value = _xp
		xp_bar.max_value = _xp_to_lvl_up

        #emit a level up signal
		lvl_up.emit()
And with that, we’ve completed the player leveling system. Now, we can move on to implementing the next feature: player upgrades upon leveling up.
New level upgrade
For this new feature, I started by mapping out the upgrade UI.
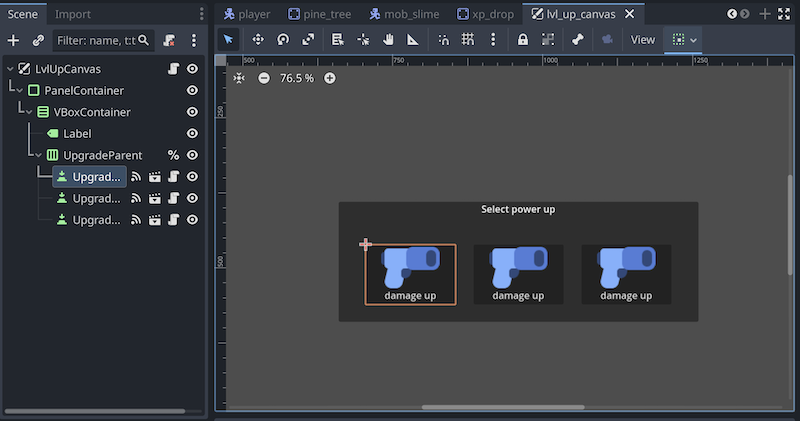
I focused more on the structure than the visuals, so the menu is straightforward but functional. The dialog window is built with a mix of vertical and horizontal box container nodes, labels, and buttons, representing player upgrades.
Next, I needed a data model to represent a single upgrade. I wanted to make it easy to create and configure upgrades to keep the system scalable. I figured I can achieve this by creating a new Upgrade resource type. In Godot, a Resource is anything that can be loaded or saved from disk; it’s essentially a data container. Textures, scripts, meshes, animations—all of these are resources.
To create an Upgrade resource, I wrote a new script, defined a class_name within it to be accessible from the codebase, inherited it from the Resource type, and added a set of properties that can be configured from the editor.
class_name Upgrade
extends Resource

@export var name:String
@export var icon:Texture2D
@export var type:Upgrade.Type

enum Type {hp_up, damage_up, speed_up, range_up, cooldown_down}
In the script above, I also defined an enum of upgrade types to differentiate upgrades in the future.
Now, we can create Upgrade asset files via FileSystem->Create->Resource and search for “Upgrade”.

I created a resource file for every upgrade type in the game and grouped them together in the “upgrades” folder. These new files have .tres extension.
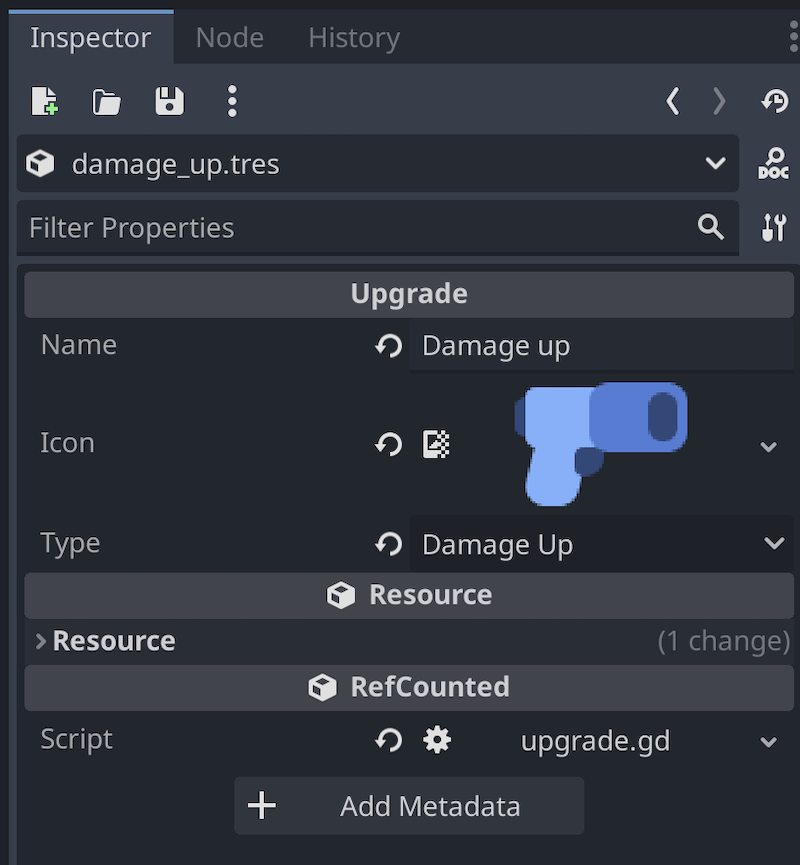
As a bit of exposure to the Godot’s AssetLib, I’ve also discovered a really nice convenience plugin named “Edit Resources as Table 2”. This plugin takes all resource files in a folder and presents them in a table format, making them easy to read and edit.
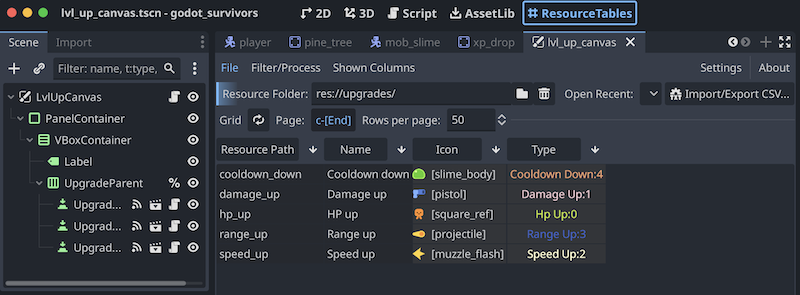
Now, to populate a level-up dialog window, we create a new script lvl_up_menu.gd and attach it to our LvlUpCanvas node.
extends CanvasLayer

#how many upgrades to choose from
@export var number_of_upgrades:int
#scene reference with an upgrade button
@export var button_scene:PackedScene
#parent node for upgrade buttons
@onready var upgrade_parent = %UpgradeParent
#signal on clicking any of upgrade buttons, returning selected upgrade resource
signal upgrade_selected(upgrade_type: Upgrade)
#array to hold all possible upgrade
var _all_upgrades:Array[Upgrade] = []
Inside _ready() function we load all our upgrade resource files from the “upgrades” project folder and add it to the _all_upgrades array.
func _ready():
	for file in DirAccess.get_files_at("res://upgrades/"):
		var resource_file = "res://upgrades/" + file
		var upgrade:Upgrade = load(resource_file) as Upgrade
		_all_upgrades.append(upgrade)
Then we expose a method for displaying the dialog, where we shuffle the list of upgrades, instantiate the required number of upgrade buttons from it, and initialize them. We then connect a callback to the on_upgrade_selected signal of each button.
func display():
	_all_upgrades.shuffle()
	for i in number_of_upgrades:
		var button_instance = button_scene.instantiate()
		button_instance.init(_all_upgrades[i])
		button_instance.on_upgrade_selected.connect(_on_upgrade_selected)
		upgrade_parent.add_child(button_instance)
	visible = true

func _on_upgrade_selected(upgrade):
	upgrade_selected.emit(upgrade)
	for child in upgrade_parent.get_children():
		child.queue_free()
Here’s a simple script for the upgrade button as well.
extends Button

var upgrade_type:Upgrade
signal on_upgrade_selected(upgradeType : Upgrade)

func _on_pressed():
	on_upgrade_selected.emit(upgrade_type)

func init(upgrade:Upgrade):
	upgrade_type = upgrade
	icon = upgrade.icon
	self.text = upgrade.name
At this point, we have a level-up dialog with a selection of upgrades. However, we haven’t yet called it from anywhere or processed the selected upgrade. For simplicity, I’m handling this in the main survivors_game.gd script.
I added two additional methods:
- In
_on_player_lvl_up()method, I pause the game, open the level-up dialog, and make enemies spawn a bit faster. - In
_on_lvl_up_canvas_upgrade_selected()method, I hide the level up dialog, unpause the game, and pass the selected upgrade to the player to decide what to do next.
func _on_player_lvl_up():
	get_tree().paused = true
	lvl_up_canvas.display()
	_mob_spawn_cooldown *= 0.8
	mob_timer.wait_time = _mob_spawn_cooldown


func _on_lvl_up_canvas_upgrade_selected(upgrade):
	lvl_up_canvas.visible = false
	get_tree().paused = false
	player.apply_upgrade(upgrade)
The final step is to apply the upgrade effect in the player.gd script. There’s little grace in how I do it, but I decided to not overcomplicate things. A simple switch statement (match keyword in GDScript) will do.
func apply_upgrade(upgrade:Upgrade):
	match upgrade.type:
		Upgrade.Type.hp_up:
			health += 10
			pass
		Upgrade.Type.damage_up:
			%Gun.damage_up()
			pass
		Upgrade.Type.speed_up:
			speed += 60
			pass
		Upgrade.Type.range_up:
			%GatherBox.scale *= 1.1
			pass
		Upgrade.Type.cooldown_down:
			%Gun.cool_down()
			pass
	pass
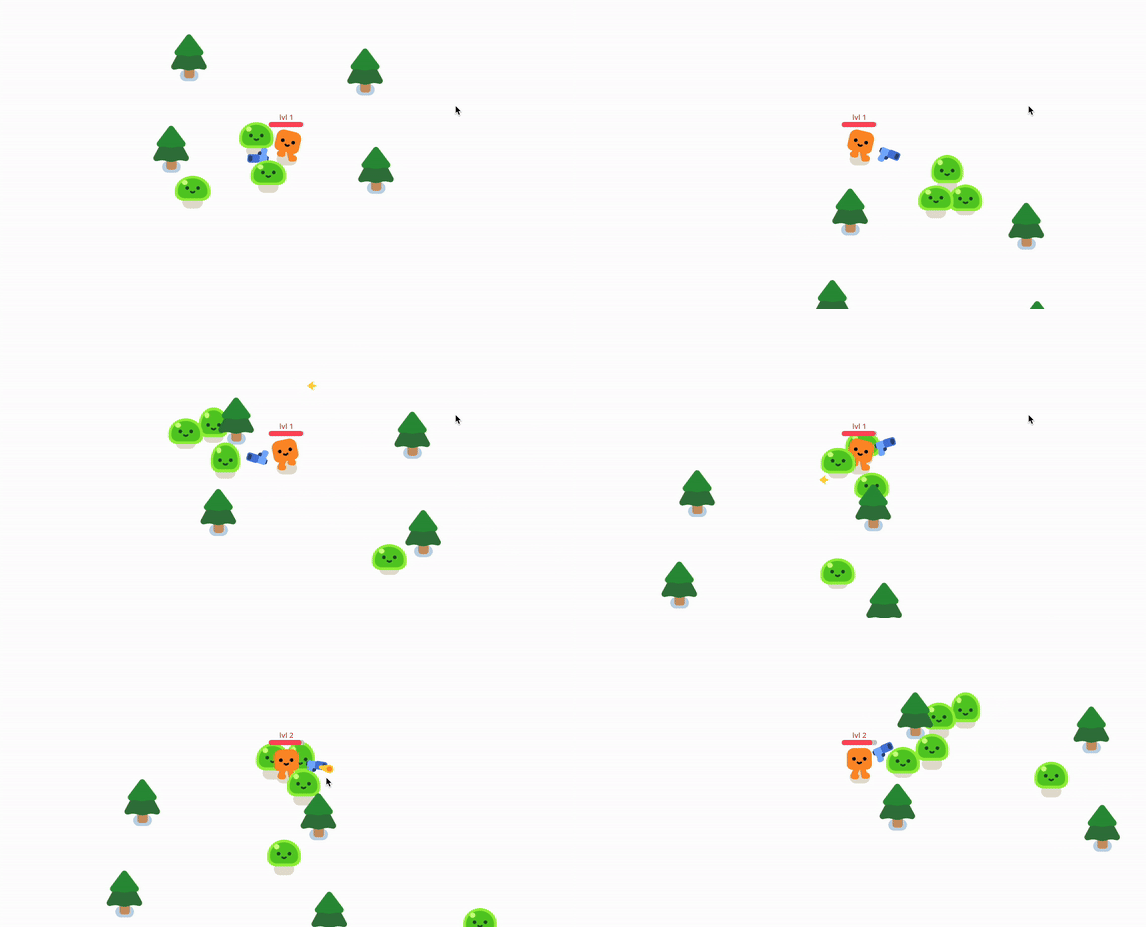
And with it, the level-up system is complete! Enemies drop XP and the player can collect it to level up. Then the player can select an upgrade, which will be applied to the character, who becomes stronger with every level, while mobs spawn faster.
Map generation
Next, I wanted the game map to be a bit more interesting and chose to use tilemap generation for it.
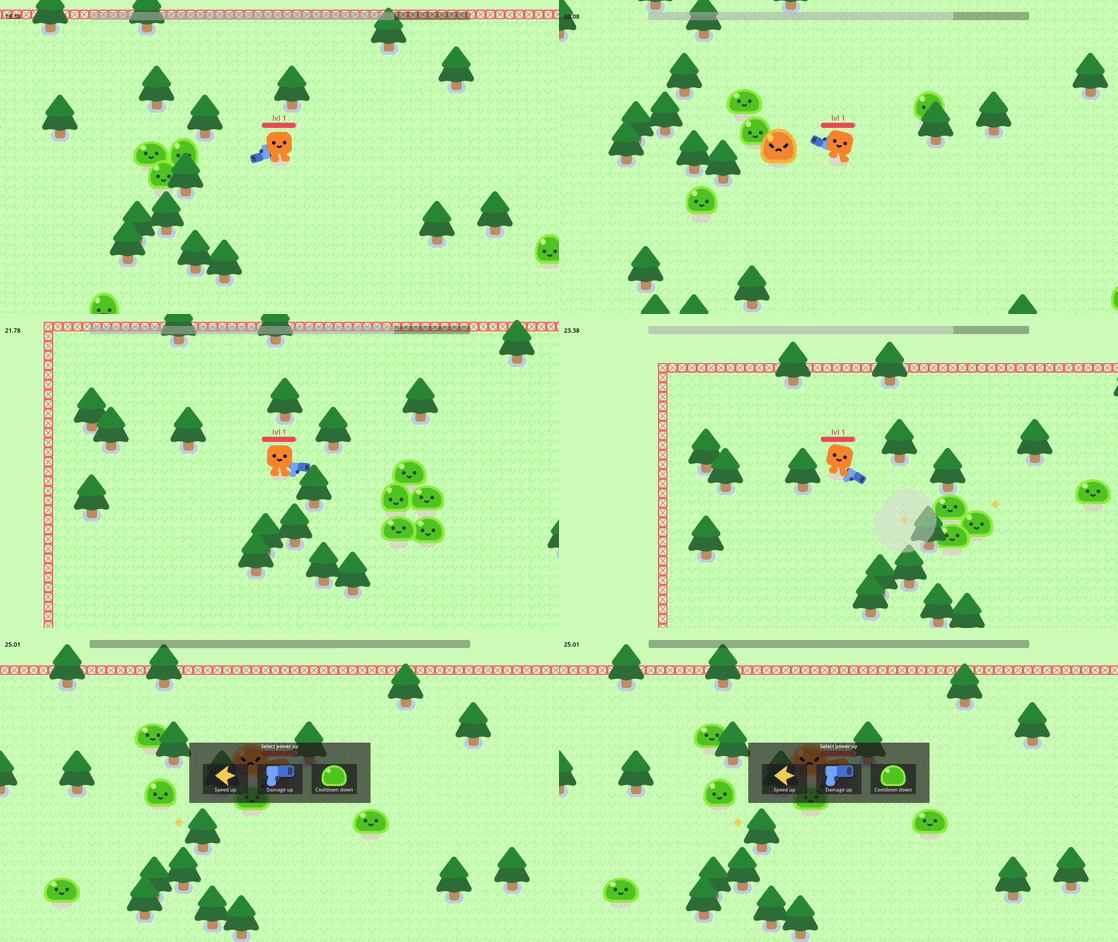
Godot provides versatile and intuitive tilemap tools for level design, which I’m sure to use a lot more in the future. This time, I wrote a simple procedural generation script, where I build walls of a predefined size and fill the space inside with either ground or obstacle tiles, based on ground_probability setting. In place of obstacles, I spawn a pine tree scene, which I already have.
extends Node2D
class_name GameWorld

signal started
signal finished

enum Cell {OBSTACLE, GROUND, BORDER}

#exposed variables
@export var inner_size : Vector2
@export var perimeter_size = Vector2(1, 1)
@export_range(0, 1) var ground_probability := 0.1
@export var tree_scene : PackedScene
@onready var _trees : Node2D = %Trees

#public variables
var size
var cell_size:Vector2i

#private variables
@onready var _tile_map : TileMap = %TileMap
var _rng = RandomNumberGenerator.new()

func _ready():
	size = inner_size + 2 * perimeter_size
	cell_size = _tile_map.tile_set.tile_size
	_rng.randomize()
	generate_map()

#check spawn position is within map borders
func can_spawn(spawn_position:Vector2i) ->bool:
	return true \
	if spawn_position.x > \
    (global_position.x + perimeter_size.x * 3 * cell_size.x)\
	and spawn_position.x < \
    (global_position.x + (size.x - perimeter_size.x * 3)*cell_size.x)\
	and spawn_position.y > \
    (global_position.y + perimeter_size.y * 3 * cell_size.y)\
	and spawn_position.y < \
    (global_position.y + (size.y - perimeter_size.y * 3)*cell_size.y)\
	else false


func generate_map():
	started.emit()
	_generate_perimeter()
	_generate_inner()
	finished.emit()


func _generate_perimeter():
	for x in [0, size.x - 1]:
		for y in range(0, size.y):
			_tile_map.set_cell(0, Vector2i(x, y), 0, _pick_tile(Cell.BORDER))
	for x in range (1, size.x - 1):
		for y in [0, size.y - 1]:
			_tile_map.set_cell(0, Vector2i(x, y), 0, _pick_tile(Cell.BORDER))
	pass

func _generate_inner():
	for x in range (1, size.x - 1):
		for y in range (1, size.y - 1):
			_tile_map.set_cell(0, Vector2i(x, y), 0,\
            _get_inner_tile(ground_probability, Vector2i(x, y)))

func _get_inner_tile(probability:float, position:Vector2i):
	if	_rng.randf() < probability:
		var tree = tree_scene.instantiate()
		tree.global_position = Vector2(position.x * _tile_map.tile_set.tile_size.x,\
        position.y * _tile_map.tile_set.tile_size.y)
		_trees.add_child(tree)
		return _pick_tile(Cell.GROUND)
	else:
		return _pick_tile(Cell.GROUND)

func _pick_tile(cell_type:Cell) -> Vector2i:
	match cell_type:
		Cell.BORDER:
			return Vector2i(0, 3)
		Cell.GROUND:
			return Vector2i(4, 0)
		Cell.OBSTACLE:
			return Vector2i(0, 3)
	return Vector2i(0, 3)
I’ve also added a can_spawn() method to ensure that mobs can only spawn within map borders.
To fill the map, I’ve imported “Simple Tileset” from AssetLib, which is basic but sufficient for the job. As a result, the map is different every run and looks more lively. Additionally, I’ve added an experience bar at the top and a playtime counter in the top-left corner. It’s starting to feel like a real video game now!
Pathfinding
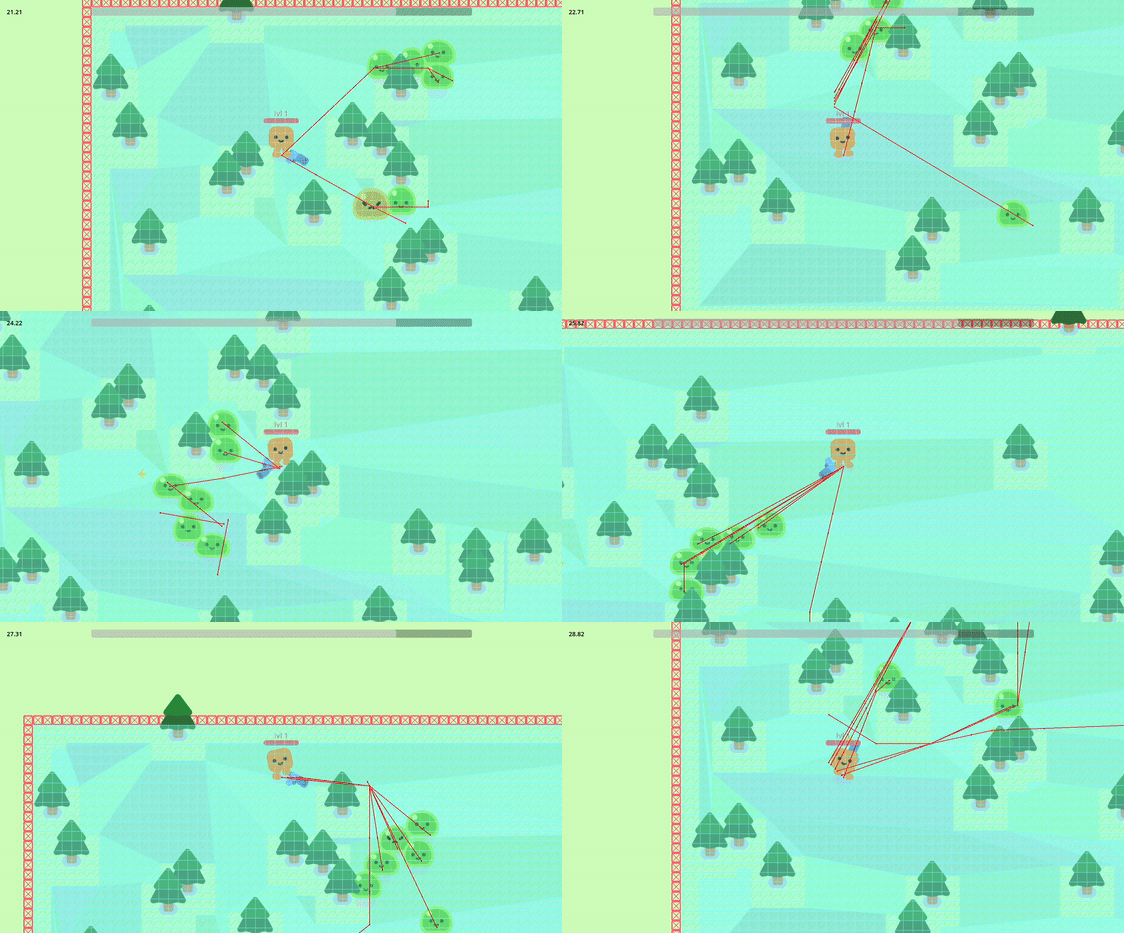
The last thing I wanted to implement was enemy pathfinding. So far, enemies were just rushing towards the player just to become stuck between pine trees, which was too exploitable. To address this, I took the time to learn about 2D Navigation in Godot.
Basically, we need two things for navigation to work: a NavigationRegion2D to define an area to navigate and a NavigationAgent2D to handle the movement.
The NavigationRegion2D requires a NavigationPolygon to bake a traversal area. While the editor provides tools to build this polygon manually, our procedurally generated map requires us to build the polygon and bake the area at runtime.
To achieve this, I added a _config_nav_region() method to the map generation script.
func _config_nav_region():
	var polygon = NavigationPolygon.new()
	var outline = PackedVector2Array([Vector2(0, 0), Vector2(0, size.y),\
    Vector2(size.x, size.y), Vector2(size.x, 0)])

	polygon.add_outline(outline)
	polygon.make_polygons_from_outlines()
	polygon.agent_radius = 60
	_navigation_region_2d.navigation_polygon = polygon
	_navigation_region_2d.bake_navigation_polygon()
The _config_nav_region() method is called right after map generation. It builds a new navigation polygon equal to the map size, configures the agent radius, and bakes the area. This process takes into account all colliders and trees on the map to carve them out from the navigational area.
All that’s left to do is to configure our navigation agents. For this, we add a NavigationAgent2D node to our slimes and modify mob_slime.gd slightly. Below, we update the agent’s target position with the player’s position every frame.
func _physics_process(delta):
	_update_nav_target()
	var player_dir = navigation_agent_2d.get_next_path_position() - global_position
	player_dir = player_dir.normalized()
	velocity = velocity.lerp(player_dir * speed, acceleration * delta)
	move_and_slide()

func _update_nav_target():
	navigation_agent_2d.target_position = player.global_position
It works great, but a tiny problem comes up - performance has dropped so much, that the game is unplayable now. This was caused by two main issues: the navigational area had too many polygons, leading to excessive waypoint calculation between enemies and the player, and all enemies were recalculating their paths every frame.
The first problem was caused by the size of the tiles - they were too small and there were too many of them. Each vertex of a tile turns into a vertex on a navigation area. I solved this issue by disabling tile collisions entirely, as they were not requied to built the area at all in my case.
To tackle the second problem I needed to reduce the number of path calculations per frame. For starters, we can make our mobs recalculate paths once per 30 frames, which is not really noticeable by the player, but saves a lot of CPU cycles.
var _nav_update_rate = 30

func _physics_process(delta):
	if _nav_update_frame_counter == _nav_update_rate:
		_update_nav_target()
    _nav_update_frame_counter += 1
...

func _update_nav_target():
	_nav_update_frame_counter = 0
	navigation_agent_2d.target_position = player.global_position
It helps, but our mobs are spawn at random time, which still allows for multiple path calculations per frame. To fix this, I took the frame counter from the mob up to the mob spawner to then synchronize the counter’s value for every new mob as it spawns. Now, all mobs recalculate their path to the target at the exact same frame, as their frame counters are in sync.
Finally, we can add a frame delay to each mob based on how many mobs have been spawned. I use a fmod() function for that, so that the first 30 mobs have sequential delays ranging from 0 to 30 frames, and the same will be done for the next 30 mobs and so on.
var _nav_update_frame_counter : int = 0
var _nav_update_rate = 30

var _nav_update_delay = 0
static var mob_counter = 0

func _ready():
	mob_counter += 1

func sync_frame_counter(frame):
	_nav_update_frame_counter = roundi(fmod(frame, _nav_update_rate))
	_nav_update_delay = roundi(fmod(mob_counter, _nav_update_rate))
	_nav_update_frame_counter -= _nav_update_delay

func _physics_process(delta):
	if _nav_update_frame_counter == _nav_update_rate:
		_update_nav_target()

	_nav_update_frame_counter += 1
	...

func _update_nav_target():
	_nav_update_frame_counter = 0
	navigation_agent_2d.target_position = player.global_position
And with this last fix, the game feels smooth and easily maintains 60fps. It’s a win!
The project is now complete, and you can find the repository by the link.
Conclusion
I didn’t expect to enjoy Godot as much as I did while making this little game. The engine turned out to be super fast and lightweight, with tools that are intuitive and easy to use. Between the brilliant Input Map, human-readable scene files, built-in script reference, signals, quick node access with the % sign (which is performant too!), and simple quality-of-life features like the Timer node, Godot is a treat to use.
I couldn’t be more excited to join the Godot community today, when the engine is receiving the attention it absolutely deserves. There’s more that ever materials and knowledge being produced for it every day and I’ll definitely continue learning Godot and using it for my personal projects in the future. It also just feels great to have such a powerful new tool in my kit!